Sign in once, then prove your Home Assistant really joined
Part 1 left you with the Tailscale app installed and running. Running is not the same as joined — at this point it belongs to nobody's network. This article covers the one sign-in that makes your Home Assistant a member of your private network, the two separate places you check that it worked, and how to read the app's status and log. That last part looks like housekeeping. It is actually the shortest route out of every problem in the rest of this guide.
Three things with almost the same name
Nearly every confusing moment in this guide comes from clicking in the right-looking place on the wrong layer. There are three of them, and they are worth separating now rather than at midnight when something is broken.
- A tailnet is your private Tailscale network — the whole thing, as a unit.
- A machine is one device that has joined that tailnet.
- The Home Assistant app is the Tailscale service managed by Supervisor. You open and configure it from the Apps page inside Home Assistant.
Think of a members-only building. The tailnet is the membership list. A machine is one key card that has been issued against that list. The app is the lock you fitted to your own front door so a card can be recognized there. When something does not work, you are always asking one question: is the problem the list, the card, or the lock?
Each layer is checked in a different place, and each has its own idea of what “working” means.
| Layer | What it handles | How you verify it in this article |
|---|---|---|
| Tailscale admin console | Accounts, Machines, routes and policy | Home Assistant appears in Machines |
| HA Tailscale app | Runs Tailscale on the Home Assistant host | Status healthy, no blocking errors in the log |
| Home Assistant | Login, dashboard and admin rights | You still log in normally with a personal account |
flowchart TD
  A["Tailscale admin console
accounts, Machines, routes, policy"] --> B["Your tailnet
the private network itself"]
  B --> C["Machine: this Home Assistant"]
  B --> D["Machine: your phone"]
  B --> E["Machine: your laptop"]
  C --> F["HA Tailscale app
runs Tailscale on the HA host"]
  F --> G["Home Assistant itself
separate personal accounts"]
Notice the last arrow. Joining the tailnet changes how a request reaches Home Assistant. It does not change who is allowed to log in once it arrives. Those stay two different questions, answered by two different systems, and Part 1's rule still holds: nothing here puts Home Assistant directly on the public internet.
Authorize once, on a machine you trust
The official app documentation opens with the same move every time: open the Tailscale app's Web UI, sign in, authorize the device, then go back to the app's log to confirm the result. Do this in a browser on a desktop or laptop you trust. Not a shared computer, not a machine in an office you are visiting.
-
Step 1
Write down what it looks like right now
In the Home Assistant left-hand menu, go to
Settings → Appsand find Tailscale. If your screen still uses the older name, that entry may read Add-ons instead — the names moved, the page did not. Note whether it is running. Change nothing else while you are in there, especially not advanced options you are not using yet. -
Step 2
Open the app's Web UI
The app page has four things worth knowing by name: Info, Configuration, Log and Web UI. This step is the Web UI. It opens the Tailscale interface belonging to this app, which is where the join actually happens.
-
Step 3
Sign in with the right account
You will land on a Tailscale sign-in page — an email box and a Sign in button, or one of several third-party sign-in options. Use the account that owns the tailnet this device is meant to join. Signing in with a different identity does not fail loudly; it quietly puts the device somewhere else.
-
Step 4
Authorize the device
Complete the authorization the page asks for. This is the moment the Home Assistant host stops being a program that has Tailscale installed and starts being a machine on your tailnet.
-
Step 5
Go back to the app's Log tab
Do not close the browser and assume. Return to the app page in Home Assistant and open Log. The app writes the outcome of the join there, which makes it the first evidence you have that step 4 worked rather than looked like it worked.
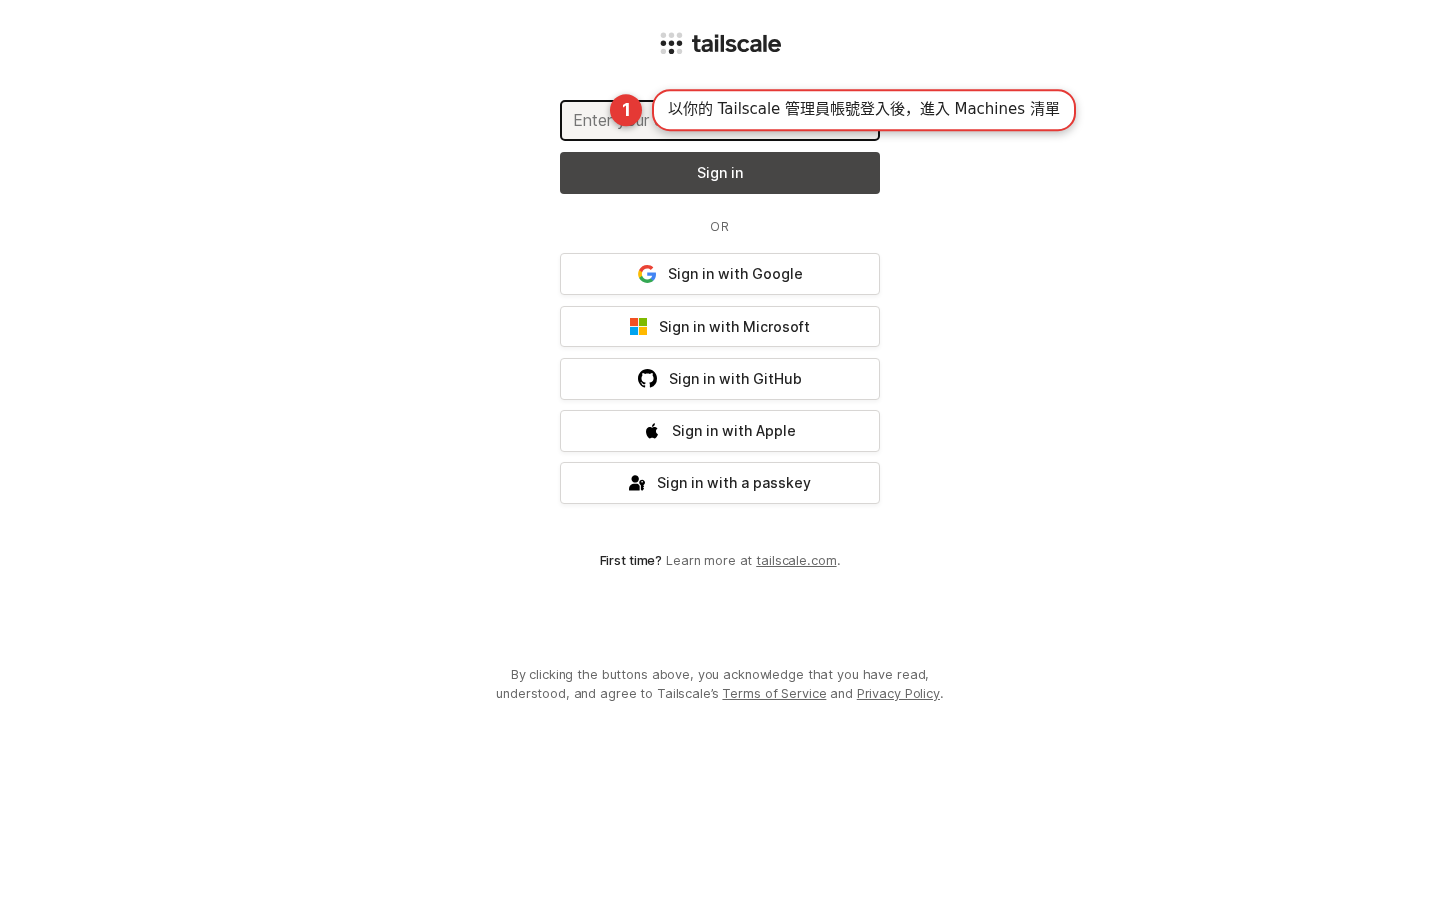
- Enter your email and the dark Sign in button are the top path. This signs you into Tailscale. It is not your Home Assistant login and it is not a second Home Assistant user — a point worth being certain of before you type anything.
- The five buttons under the OR divider — Google, Microsoft, GitHub, Apple and a passkey — are identity providers. Whichever one you pick becomes the account that owns this device's membership. Pick the one that already owns your tailnet, not whichever is one click away.
- First time? Learn more at tailscale.com sits just below them. If you genuinely are on a first tailnet, this page is also the point where one gets created — so it matters even more that you are signed in as the identity you intend to keep.
- The Terms of Service and Privacy Policy links at the bottom apply to every button above, including the third-party ones.
- The red 1 is the source author's marker, and the Chinese note beside it points forward to the Machines list as the next stop. Worth saying plainly: this page does not show a Machines list. It is the sign-in, and nothing more. The Machines check comes next, in a different place.
Two separate places have to agree
A sign-in page that redirects without complaining is not proof of anything. Two places can confirm the join independently, and they are worth checking in this order.
Authorize once, verify twice. It is the difference between a courier app saying “delivered” and you walking to the porch to look at the box. The app is usually right. The reason you still walk out there is that when it is wrong, it is wrong quietly.
First, inside Home Assistant. The Tailscale app has its own page showing what this device now is on the network — its device details. That is the local view: the host telling you what it believes about itself.
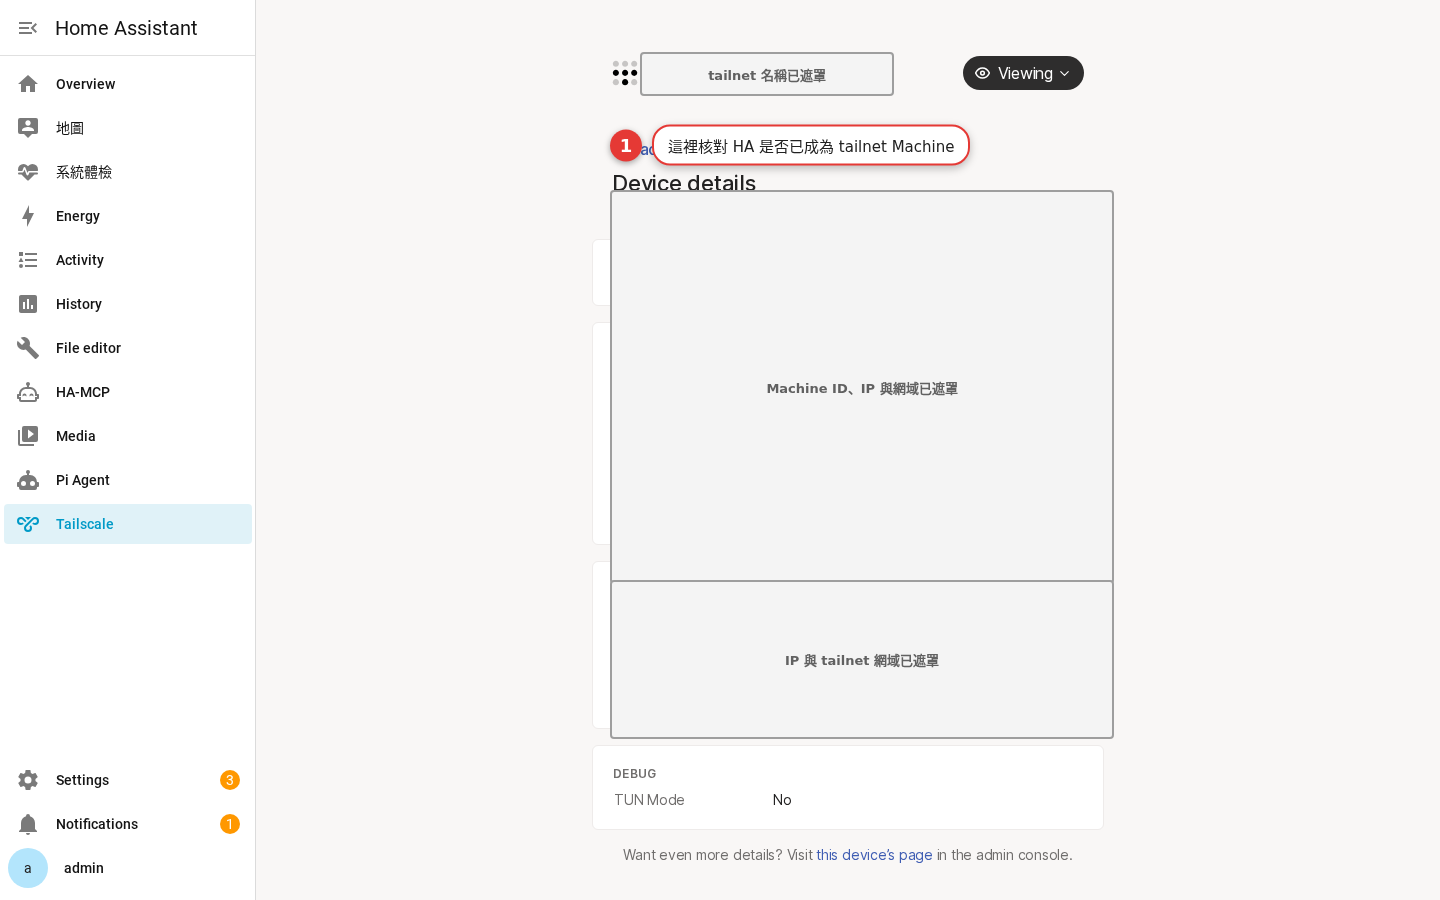
- Tailscale in the sidebar is highlighted blue — you are still inside Home Assistant, on the app's own page. This is not the Tailscale admin console, and nothing on this screen governs the tailnet.
- The gray boxes stand where the tailnet name, the machine identifier, the IP addresses and the tailnet domain appear. They were covered before this screenshot was published. On your own install those fields carry real values — and those values are exactly the ones the warning above tells you not to publish.
- Device details is the heading that matters. If this section is populated on your screen, the host believes it is a machine on a tailnet. That is the first of your two confirmations.
- DEBUG → TUN Mode: No is a single row near the bottom. You do not need to act on it. Note the value down, because it describes how this app is running on your host and it is the sort of detail a support channel asks for first.
- Want even more details? Visit this device's page in the admin console is the last line, and it is the doorway to the second check. The link crosses from the local view to the authoritative one.
Second, in the Tailscale admin console. Open the Machines page and find the entry that corresponds to this Home Assistant. Confirm the machine, its last-seen status and its feature badges.
flowchart TD
  A["Signed in and authorized
from the app's Web UI"] --> B["Check 1 · Inside Home Assistant
Device details is populated"]
  B -->|"populated"| C["Check 2 · Admin console
Machines lists this device"]
  B -->|"empty or errored"| D["Read the app Log
the join did not complete"]
  C -->|"listed, seen recently"| E["Joined. Move on to the test"]
  C -->|"not listed"| D
  D --> F["Return to the Web UI
and complete the sign-in"]
  F --> A
While you are in the Machines list, spend thirty seconds on it as an inventory rather than a checklist. Is the account you signed in with the right one? Is Home Assistant still managed with its own separate personal accounts? Are there devices in the list you no longer recognize, or ones that were retired and never removed? Least privilege is the principle underneath all of it: only the people who need to reach Home Assistant get a path to it, and only the people who need to manage the tailnet get admin console access.
Logs are evidence, not decoration
This is the part people skip, and then spend an evening guessing. Learn to read the app's status and log before you change any network option, because from Part 3 onward every change you make is one you will want to be able to check.
The order is always the same. Is the app running? Then read the last few lines of its log. Two questions, in that order, and they tell you which of the three layers to go and look at.
flowchart TD
  A["Remote access is not working"] --> B{"Is the app running?"}
  B -->|"no"| C["Start it, then read the log
from the beginning"]
  B -->|"yes"| D["Read the last few lines of the log"]
  D --> E{"Does it show a
blocking error?"}
  E -->|"yes"| F["Fix at the app layer
then re-check Device details"]
  E -->|"no"| G{"Does the admin console
list this machine?"}
  G -->|"no"| H["The join is incomplete
go back to the Web UI"]
  G -->|"yes"| I["Check the client device
is on the same tailnet"]
Leave the log level alone
Keep log_level at info. The official documentation lists it as the recommended level, and it is the level all of the advice above assumes. Raise the verbosity only while you are actively troubleshooting one specific thing, and turn it back down when you are finished.
A log level is a volume knob. At info you hear the announcements. Turn it up and you hear every conversation in the room at once, which is useful for about ten minutes while you are listening for one particular voice, and useless the rest of the time. It also fills the log with far more detail about your network than you would want to hand to anyone.
Why there are no example logs here
You may have noticed this guide never prints a sample log, and that is not an oversight. Real logs from a working install contain accounts, device names, your tailnet domain, private IP addresses and sometimes login URLs. A fabricated one would be worse than useless, because you would compare your real output against invented lines.
So do it the other way round. Read the startup and connection messages on your own app's Log page, and when you need help, ask your support channel with a redacted excerpt — the few lines around the problem, with identifiers removed.
The test only counts on the second network
Testing remote access while sitting on your home Wi-Fi proves nothing at all — everything works there anyway. The acceptance test has two halves, and the second one is the real one.
-
Half 1
On the home network
Open Home Assistant on your local network and confirm that the existing accounts and the dashboard were not affected by anything in this article. This half is not testing Tailscale. It is testing that you did not break what already worked.
-
Half 2
On a different network
Switch your test phone to mobile data, or to another network you trust. Confirm Tailscale is connected on that phone, then open Home Assistant once. That single successful page load is what you are actually buying with all of this.
One limit on that test, and it applies from here to the end of the guide: test only targets you are authorized to manage. Opening your own Home Assistant is the whole test. Probing other addresses, other people's devices or anything on a network you do not own is not troubleshooting — it is scanning somebody else's property, and no part of this guide asks you to do it.
-
Then
Record the result
Write down success or failure, which device you used, and the time. Six weeks from now, “it used to work” is worth nothing and “it worked from the managed laptop on mobile data on the 19th” is worth a great deal.
-
And stop
Stop at the security boundary
Exit nodes, DNS override and public Funnel setup are outside this guide. Leave them disabled unless you have a specific need and have read the official documentation for them separately.
The same restraint applies to everything else you might be tempted to switch on while you are in there. Start with the smallest setup that works, then expand one step at a time. If all you want is to see your dashboard while you are away from home, private access over the tailnet is usually easier to control than a public entry point. If you need to reach a LAN subnet, list one subnet with a clear purpose first, and do not advertise every network at once.
| What you want | Where to start | Not yet |
|---|---|---|
| View Home Assistant remotely | Private access from a device signed in to the tailnet | Open ports and unnecessary public sharing |
| Manage your devices | The Machines list, with personal accounts | A shared admin login |
| Reach your home LAN | A single approved subnet route, with a clear purpose | Advertising several subnets before taking inventory |
The third row is Part 5's whole subject, and it is listed here mainly so you can see what “not yet” looks like from where you are standing.
Five lines that make this handover-safe
The biggest risk with network settings is not a bad setting. It is a good setting that worked at the time and that nobody can explain a year later. When you finish this article, write down five things: the date, who did it, the purpose, the state before and after, and the device you verified with. Your password manager or your site maintenance notes are the right home for that.
Here is what one looks like written out, taken from the source guide:
One sentence. It names a date, a person, a claim and the evidence for the claim. Later, once you reach subnet routing, you would add a line such as “only a single approved LAN CIDR is advertised, approved in the admin console” — describing the decision without writing the range itself into the note.
That last distinction is the one to get right, because the record is not a place to store secrets.
| Record this | Keep out of public docs | Who needs it next |
|---|---|---|
| Purpose of the change, date, verification result | Credentials, auth keys, login URLs | The Home Assistant maintainer |
| Each machine's purpose and its owner's role | The full tailnet domain and private IP addresses | The Tailscale admin |
| Which subnet, with a clear purpose, was approved | Unredacted CIDRs, scan results, street addresses | The network maintainer |
Passwords, auth keys and full private subnets belong in a controlled secrets manager. Never in a public repository, and never alongside customer names or street addresses. What stays in the notes is only the description the next maintainer needs in order to understand the decision — which is what lets somebody judge which layer to roll back when a phone is lost, a router is replaced, the app is updated, or admin rights are handed to someone else.
The things that actually go wrong here
I cannot find Apps in the Settings menu
Home Assistant is not showing up in Machines
Machines shows Home Assistant, but Home Assistant will not open
The route seems to exist but the LAN is unreachable
My screen says Add-on, not App
Does Tailscale replace the Home Assistant login?
Do I need to open a port on my router?
Can I set up an exit node or DNS override while I am here?
Things got uncertain after I changed several settings
The four pages worth knowing by name
Of everything on those two sites, the source guide points at four pages specifically. The first one covers this article. The other three cover ground you reach in Parts 4 and 5 — they are listed here so you know the documentation exists before you need it, not so you go and switch things on tonight.
share_homeassistant, advertise_routes and userspace networking — the app's own documentation. Those two option names are worth recognizing now: they live in the app's Configuration tab, not anywhere in the Tailscale console, which is why people search the wrong site for them.advertise_routes in particular does nothing on its own — a route that is advertised and not approved simply sits there — and a route approved without an inventory of what lives on that subnet opens a wider door than you meant to.Where to go from here
Your Home Assistant is on the tailnet. Now use it from somewhere else.
Part 3 covers opening Home Assistant properly from a phone or laptop away from home, and then what the Machines list is really for — naming devices, reading last-seen status, and revoking a device when it leaves your hands.
Open the full guidePart 2 of the Home Assistant Tailscale Remote Access Guide series on the Apporo blog.
Adapted from the Home Assistant Tailscale Remote Access Guide, produced by WoowTech and released under CC BY 4.0. This adaptation is published by Apporo under the same licence.
Light · Air · Water · Control · apporo